Thursday, July 27, 2017

#reboot

Summer for teachers is a time to relax, reflect, and reboot. As teachers we put a lot of time, thought, and effort into our students and classrooms. Unfortunately, at least for me this often means I forget to reflect and reboot my personal life, I am always trying to find a better way to balance work and personal life.

The opportunity to have this reflection came while I was in Germany on the #gafe4littles. They held a slow flipchat in which we used Flipgrid to video record our answers to questions and chat with each other about topics over a week span ( which I was thankful for given the time difference). I responded to my school goal, but the question continued to linger in my mind.
Reflecting back on the craziness that was my life over this last school year I noticed the huge impact it had on my relationships with friends, family, and myself. I survived and am stronger because of it. As I begin to lift from the fog of a very busy year I am reminded of the reboot button we often use in tech and when reflecting on our classrooms. In an effort to reboot my life as I reboot my classroom every year I have made some organizational and personal goals.

My life reboot includes: ‘
  • This reboot/upgrade includes home improvements, my goal is to take a couple each day to do something in my house with no technology (except maybe Spotify for music).
  • I am also rebooting dinners, I am really trying to prep and plan out dinners.
  • Yoga at least twice a week. I am hoping this will help me be more mindful and present.
  • Technologically I am rebooting my image with a new G-sites for all my materials. https://sites.google.com/view/technicallyteaching/home
    • Every Christmas my family participates in a tradition of everyone gets 4 gifts something they want, something they need,something to wear, and something to read. I took a similar approach on the site with a Top Tech 5 of the month. Each month you will get a Tech tool to check out, a recommendation for a book to read, suggestion for something to listen to, a must read blog post or video, and someone new to follow on Twitter.
    • I also plan to blog once a month, but with this reboot am going to try a new blogging technique one that is interactive. In this interaction readers will be encouraged to use tools on their computers to help create things to help with their teaching practices. I have planned it out to try and make it a more consistent occurrence.
    • Finally, I will kick off my YouTube channel soon, I will hold once a month how to videos on using apps or G-suite tools throughout the year.

I am hoping that this more organized structure and focus in my life will help me to be a better teacher as well as a better wife, doggy mom, and friend.  

The first blog challenge is how will you reboot your classroom this year? Fill free to use the template below and share it with others on social media, or colleagues in your building.


Saturday, May 6, 2017

#classroompart2

#Classroom2

After the initial setup of Google Classroom, I continue to use Classroom as the go to hub for all things digital in my classroom. Students know that they login and go to classroom for anything on our Chromebooks.

First thing in the morning I get 4-5 Chromebooks out and use these Chromebooks for students to check in. I have created a Google form which I put in Classroom as an announcement. The google form looks like this:
Check In 2 22   Google Forms.png

After I have signed in the Chromebooks, students get into classroom and fill in the form. I have left the submit another response option on to the end of the form so another student can come in behind them and check in. When finished students come to the carpet have a short discussion time as they wait for other students to finish checking in,and the morning announcements. Following the morning announcements, students start with calendar on the Interactive whiteboard, as I take my Chromebook, check the results of the form and take attendance and lunch count.   

At the end of calendar time, we go into ELA whole group time, which they use their Chromebooks to get into classroom and open their hyperdoc assignments. ( See https://goo.gl/dKu8C7 for information about blended learning and the hyperdoc).Each student is given their own copy through the assignment feature in Classroom.  Each slide represents a day of the week slide one Monday, slide three Wednesday, etc. I recently changed it so that students fill the background color of the square once they have completed the activity.

For those go to websites that students often go to for early finishing, or free tech time, I place those within classroom. These most used websites are located under the About tab. I then have a quick tech talk with my students about where to find these resources, then we practice getting to the sites and interacting on these sights. There are certain times students can and can not get on these sites, as I want to make sure to instill a good balance in their lives.  

In the last couple of months Google Classroom has opened a feature that allows the teacher to differentiate assignments within the Classroom Stream. This has been a game changer for me, when it comes to being able to give students at level text for them to listen to and read. I use this feature in conjunction with Texthelp’s Fluency Tutor. Students are given a passage at their Lexile level, can listen to it as many times as they need and then record themselves reading the passage, which they submit to me and it lands in my drive. I can then do a running record with the WPM and % accuracy is calculated for me as I mark the passage. I can then grade students on a premade fluency rubric and students can see their scores. I can then use these recordings at conferences with parents if I want them to hear something I want them to really work on at home.

I often get asked how I keep students accountable for actually getting work done and not just playing games the whole time. My answer is instilling digital citizenship talks throughout the year. I also use the all to handy teacher institution, you know that feeling you get when you're working with other students and you can tell students are off task, either the look around room sneaky, or they are obviously playing games when they should be typing sight words.

I have shown students how to access their files in drive and tell them that this is how I check to see how they are doing on their work to see if you need help. My main concern in Kindergarten is not to punish students for their misbehavior but to get them use to the tools and help guide them with making digital citizenship choices. Like all other things Kindergarten is setting the foundation for school. I don’t scold students who aren’t doing work when they are suppose to but say, : I see you didn’t get very far in your assignment, can a Google guide or I help you?” This often opens up the discussion so students see, it’s OK to not know and ask for help.  

These are just a couple ways in which you can implement and use classroom to help blend your instructional practices with little's. There are many more, be sure to check out christinepinto.com, #Gafe4littles chat on Tuesdays (1st and 3rd Tuesday of the month), listen to awesome ideas on Google Teacher Tribe podcast or the #gttribe. Look to your PLN for ideas as well.

Sunday, April 23, 2017

#GettingstartedwithGoogleClassroom

#GettingstartedwithGoogleClassroom


File:Google Classroom Logo.png - Wikimedia Commons


Google Classroom was an exclusive feature for EDU license that has now open up within the Gsuite environment. It allows you to manage and push out content to your students, even grade and differentiate assignments all in one stop. No more I lost that assignment talk or my dog ate the homework excuses. But most of all it is the perfect place to get our younger students exposure to all the apps in the Google Suite. A playground where they can crawl, run or leap and land in a pool of soft foam. I am going to start off with the beginning how do we get into Google Classroom (Classroom) and begin using it.


Before I ever started with Classroom, I sat looking at the upper grades going oh that is such a nice feature for them to organize all their assignments they hand out, and then can grade. As a Kinder teacher I just thought it was a tool I would use some day. I would learn about it during the summer or a break, and then spend the rest of that break finding ways to modify it to fit my Kinders needs. This year I decided to really blend technology into my teaching practice, so I talked with several people and did some research and then decided to quit trying to plan and scheme and just jump! I knew I wanted my students to all login and work on a collaborative doc the first time they logged in. The question then became ok how are they going to get the doc. That is when Classroom came gleaming like a beam of light from heaven through the thick grey Seattle rain clouds.


In an effort to blend technology into my teaching practice I knew I needed to start early on in the year to really give them the most exposure to all there is for them to explore.Before we logged in I as a teacher setup our classroom. I went to Google classroom clicked the + sign and then clicked create class. I named the class checked under the students tab and got the class code. I then created a doc inserted a table that was 4x5, titled it My Name Is. Then I went into classroom and clicked on + sign in the bottom right of the screen and added an assignment. Named the assignment 1 clicked on the drive symbol and added the doc I created. The wonderful thing about this is once the doc was uploaded on the right side of the assignment box I was given options as to if I want students to have edit rights, a copy for each student, or view only permissions. I chose Edit rights, since I wanted all the students to be able to work in the same doc. I suggest that if you use each student can edit that you make a copy of the assignment in your own drive so if something happens you have a backup document. My favorite feature I use the most is the make a copy for each student and then you don’t have to worry about the master getting messed up. For the purpose of this assignment editing rights worked best.

On the 5th day of school I had my students login ( for more information about my login process see my earlier article https://goo.gl/ce1KL7) They then clicked on the classroom extension that was added by the district ( I highly recommend having this extension on your chromes) then they clicked join class and entered the class code that was written on the board. I will admit most of them had assistance from the helpers in my classroom to type the code. Once students were in classroom I had them come to the carpet so we could discuss what they were going to do next.


At the carpet I showed them how to open the doc and how they were going to use the table to type their name. “Each one of you is going to have a parking spot to type their name, see these boxes they are like parking spaces for your writing. When you go to the store or a restaurant can two cars fit into one parking spot?” Insert kiddos response of no or one time my mom/dad tried to fit in a parking spot with another car and we hit the car. Lol we had a quick tell a friend your parking lot story. I told them that they can see the other person’s car based on the different colored lines, they need to be careful of the space they are using to type. Like parking a car check to make sure no one else is in the spot/box you are using.Students were sent back to go ahead and do the assignment. I had the doc projected on the board so I could monitor traffic ( over writings, deletion etc). As I monitor the board I also walked around and make sure students were able to access and find a parking spot in the doc.  The students got to work on the collaborative slide typing their names. There were a couple accidents, “hey you’re typing in my space” or a “ Where did my name go.” But for the most part very few accidents occurred.

After the initial parking lot experience. I make sure to use classroom for all technology activities. Students rarely use their bookmarks bar, but go to classroom to find what they need. Check out #Classroom2 to learn  more about how I incorporate Classroom in my class.

Wednesday, March 29, 2017

#Blendedlearning #gafe4littes

As I am preparing to co-moderator with the incredible, fabulous, and wonderfully top-knotted Christine Pinto on the #gafe4littles chat April 4 at 5pm PST, I asked myself what would be an appropriate yet inspiring chat topic. I thought of questions I am often asked about me classroom “Is all your kiddos do is play on devices all day, when do they read real books, are they going to read real books, what about math how will they learn the basic concepts?” This lead me to blended learning. Blended learning is an approach in education promoting the blend of technology and non-tech/ traditional classroom teaching. Check out this video for a brief overview of blended learning. https://vimeo.com/89546618

One thing I always make sure to emphasize in my classroom, is that technology is just a natural part of our classroom environment. Students are aware of what it means to be a digital citizen and how to keep themselves organized with progress charts in their journals. Students love the use of technology, but almost all of our reading is done in actual paper books, students practice penmanship and writing in journals and handwriting practice books, as well as learn phonics electronically and in small group activities.

In my classroom blended learning can be seen, most notably in my ELA block. I have decided to take part of my whole group instruction online for my students. If you walk into my classroom during our morning ELA block you will see some kiddos working on hyperdocs, students in a small group with me or a parent volunteer, reading at their level books around the room, or trying to find sight words hidden in a picture.

ELA U4 L20 wk 2 (1).jpg
( All card pictures are property of Houghton Mifflin Harcourt Journey’s curriculum. I do not own the rights to these photos, this photo is to show an example of how I integrate my curriculum within a blended learning environment.)

Within the hyperdoc pictures have a short 30 sec - 1min video in which I explain what to do on each section.This allows students to go back over and listen to the instructions whenever they need to. I set up an environment where there are 3 Google Guides in my classroom each week, these are students that can help trouble shoot any problems that arrive. Students know to ask other students in the classroom for help before seeking my input. This goes with my blended learning model as Kinders are having to troubleshoot, problem solve, and collaborate to find a way to get their work done. The ownership, pride and just natural enthusiasm for these activities leak into all the other modes. Kinders learn to work through and communicate when they are stuck in math, or even reading a word.

I think the most important thing to remember when trying to incorporate blended learning into a classroom is to start small. Blend a lesson, unit, or something you are comfortable starting on or a lesson that can use a reboost. Then be prepared to FAIL especially with littles. I readjusted my hyperdocs 3 times before I landed on the format we have now. I took a lot of littles advice until we arrived at this final product. I will admit that initially I put in more time. I have been working with this method for about 2 months now and I can easily copy the basic format over and am able to complete this during my Sunday planning times for the week.

Remember, blended learning can open up so much time for activities. LOL, Step Brothers modified quote. In all seriousness, blended learning enables me to get testing done, and work one on one with my Kinders who are struggling with key concepts. Start small and try just blending a lesson for your kiddos or a themed study unit. You don’t have to go all tech actually that is important to note, blended learning is just that blending technology into the natural learning that takes place in your room. If you want more ideas, hints, tips, and tricks join the fabulous Christine Pinto and myself for a chat about blended learning at #gafe4littles April 4th 5pm PST.    

Sunday, January 22, 2017

Login's and Chromebooks and Kinders OH MY!


The most dreaded words for any Teacher especially Kinder Teachers when it comes to technology is “Logging In”. The running around, the lack of letter and number recognition skills and now they have to do both multiple times, the passwords that are usually ridiculous set up by admin that don’t understand the struggle of a 8+ character password for a 5 year old. Not to mention the motor skills needed to use a mouth or the lack of saliva needed to operate a touch pad. The numerous call outs of “TEACHER” about it not working, asking what a letter looks like, or something strange is happening on the screen and not to mention the time it takes, the list goes on and on.
For most teachers the stress of this event is enough to put them and the kiddos in tears, which results in the coveted phrase, “Never again….or until the next testing window.” Whenever I talk with other teachers about technology in a Kinder classroom the first thing they want to know is about Logging in and if there is a magical spell that can make all the troubles go away. I always make sure to tell them that Logging in is always the hardest part, but I have several tips that can help alleviate a lot, but not all of that stress.


1-GET HELP! No seriously, ask everyone you can think of to come down and help with logging your kiddos in. Librarians, TOSA’s, Principals, Secretaries, Custodians,paraprofessionals, 5th graders, parent volunteers, central office admin. Anyone to help. This makes it so everyone is done in one time slot and will reduce the number of kiddos to adult ratio, so there are maybe only 3-5 yelling at you instead of 10+.  When I log my kiddos in for the first time, I always ask via email, and in person for volunteers to come in and help us out. Additionally, inviting tech admin in to help you gives them a better idea of how their decisions impact students and what they can actually do.


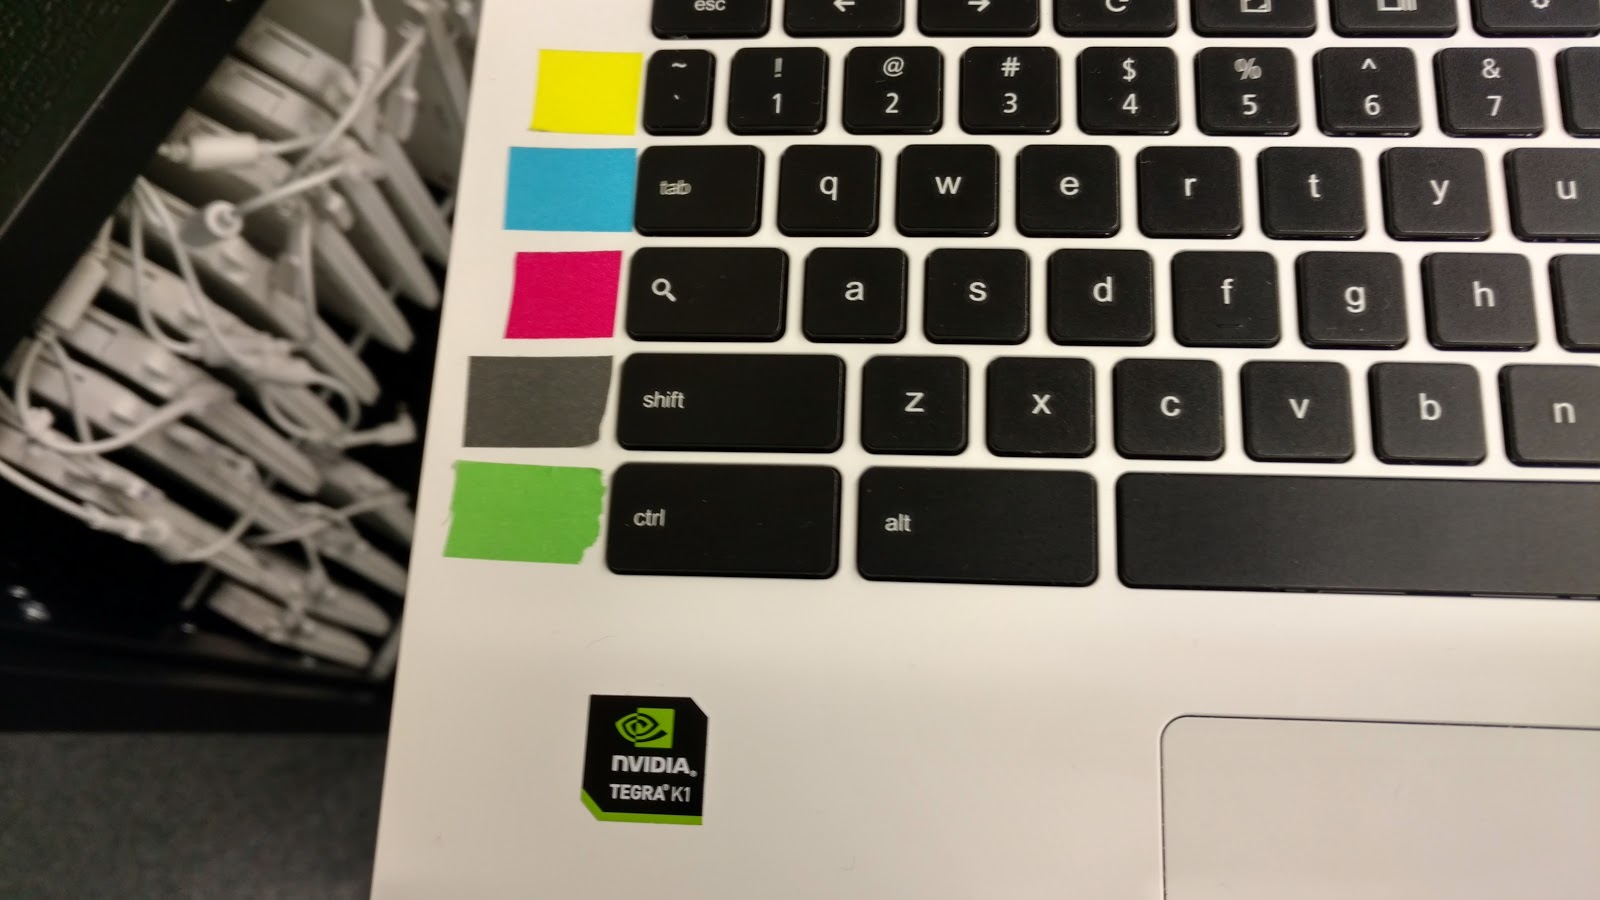
2-COLOR CODE! This is a wonderful trick I picked up from Christine Pinto on #gafe4littles website which can be found at christinepinto.com. Color code your keyboards. This way when they need to type that 14 character username for the 1st time you can direct them with look in the blue row, green row, etc. I use washi tape on the edge of the keyboards to do color coding. This is very time intensive to set up every device, but very worth it, and again ask for help!
Here is what my Chromebooks look like.


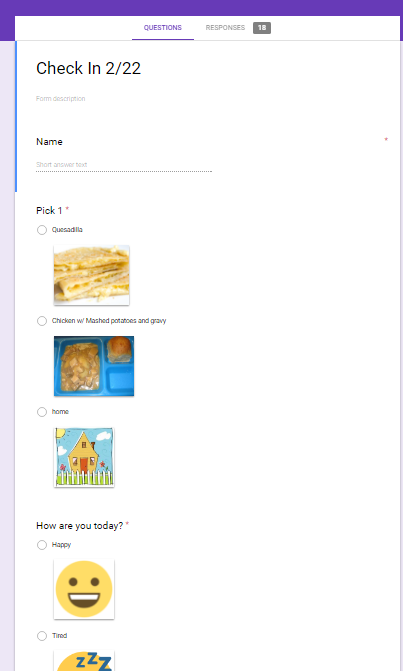
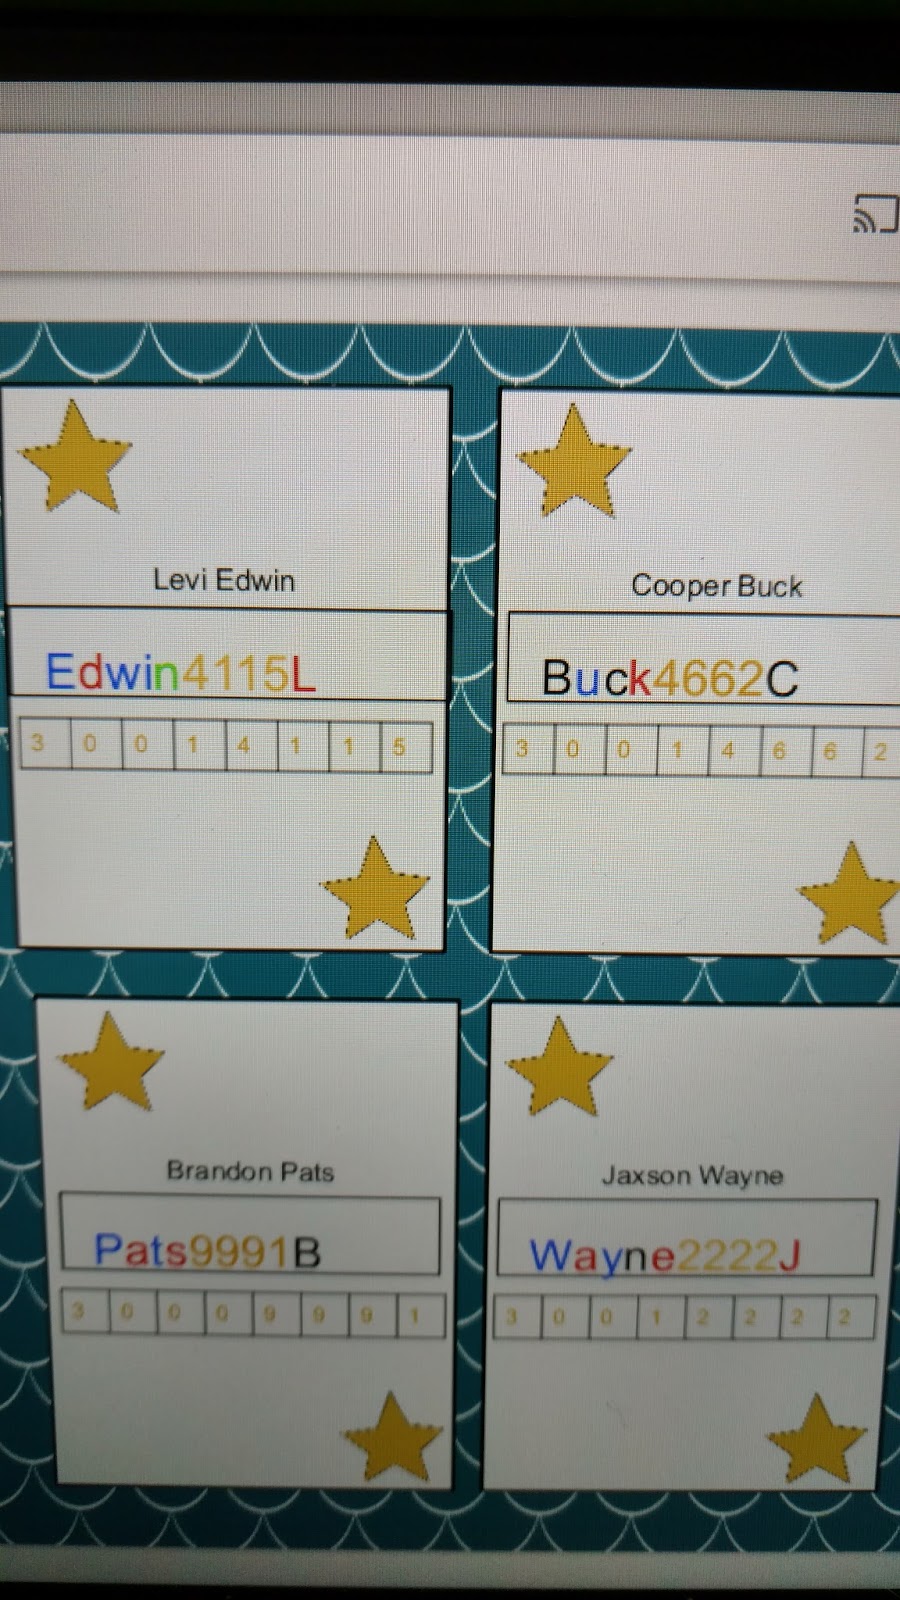
3-LOGIN CARDS! Give each kiddo a personalized login in card, with their name, username, password, and computer number on the card. This one was the kicker for me and my kiddos. Huge thank you again to Christine Pinto and #GAFE4littles for this idea as well. I took the idea they had and modified it to fit what my students and I needed. Each card has the student name on it but then the BIG part is the color coded username and passwords. Color coding each letter in their username and password helped my kiddos who did not know their letters and numbers be able to find them much easier. They were able to find the letter in the pink/red row and then look for the letter that looked like the one on their card. Now I will admit my first round of cards I forgot the keyboards were all in lowercase so I had to go back and make sure they were identical to the keyboard they were using, especially to start.


Here is an example of my login cards, you can purchase my template on TPT.
IMG_20170121_200501081_HDR.jpg


4- DON’T START WITH LOGGING IN Lesson 1! Now this may be well weird to be so far down my list, but the other stuff is mostly prep work you will need to do before the kiddos can login. While you are prepping your volunteers, Chromebooks, and login cards get the computers out! I always use my first lesson to talk about carrying Chromebooks, the parts of the Chromebooks, taking them out and putting them back, and turning on and off. I check with my Librarian/Media Specialist before the lesson about what they want this to look like in the school. I then take what they have told me and incorporate in the lesson.


Our first day with Chromebooks, I show the kiddos the cart. I talk about the plug in and how it gives our Chromebook food(power) to keep it’s energy level up. We then talk about how to unplug, take out the Chromebook,carry the Chromebook,how to put it back, and plug it in. I will usually tell students their assigned number at this time. Kiddos come up when their name and number are called practice, unplugging a Chromebook taking it out and then carry it to line up to go on a field trip to the library. We practice carrying our Chromebooks the right way all the way to library, then talk about how to place the Chromebook down first, and then sit at a table. Now, yes they are 5 and this is risky, but I promise you they can do this. I tell my kiddos that if they can not carry it to the library then I can carry it for them, but then I get to use it and they have to sit and watch. This usually makes all my students focus very hard on carrying them correctly.


Once in the library we practice how to open the Chromebooks. Then we look at all the keys and letters. We talk about how the rows have different colors, and we talk about the track pad at the bottom. Now most Chromebooks turn on automatically when you open them, so they don’t turn them on to start. We teach them where the power button is and how to press and hold to turn it off. We call the power button the smiley face with a long nose button. Then we show the kiddos how to turn it back on, both by closing and opening the screen and using the power button. After we are done with this we practice standing, pushing in our chairs, and grabbing our Chromebooks as we walk back to class.


Once in class kiddos make a line at the cart and we practice putting the Chromebook away and plugging it in.


5-LOGGING IN! Lesson 2: Now that your kiddos know a little about their Chromebook, how to carry it and open and close the device. It is time to login, hopefully you have your helpers, your keyboards color coded, and your login card printed ( PS keep a copy of all the login’s and passwords with you, even make copies for each volunteer just in case). Walk your students through the process, having them stop after completing each step ( I usually have them put hands on head or sit on hands when done) this signal tells me they are ready for the next directions. Once they are logged in there are a couple of options you can give them some time on an educational gaming site like STARFALL or ABCYA! or you can just have them sign out. If you have them sign out they need to then practice logging in again and signing off again.  


That is how I help to relieve the stress of logging in with Chromebooks. I hope this helps you as you start to login and use technology with your kiddos. If you have any questions you can reach out to me on twitter @hawkskhaleesi, comment below or email me at technicallykinder1@gmail.com .

Until next time play more, teach passionately,use tech,and be Kinder
Lara